Remnawave Node
Remnawave Node is a lightweight container that includes Xray-core.
Remnawave Panel does not include Xray-core, so you need to install Remnawave Node on a separate server to use all features of Remnawave.
Install Docker
Install Docker if not installed yet.
sudo curl -fsSL https://get.docker.com | sh
Step 1 — Create project directory
mkdir /opt/remnanode && cd /opt/remnanode
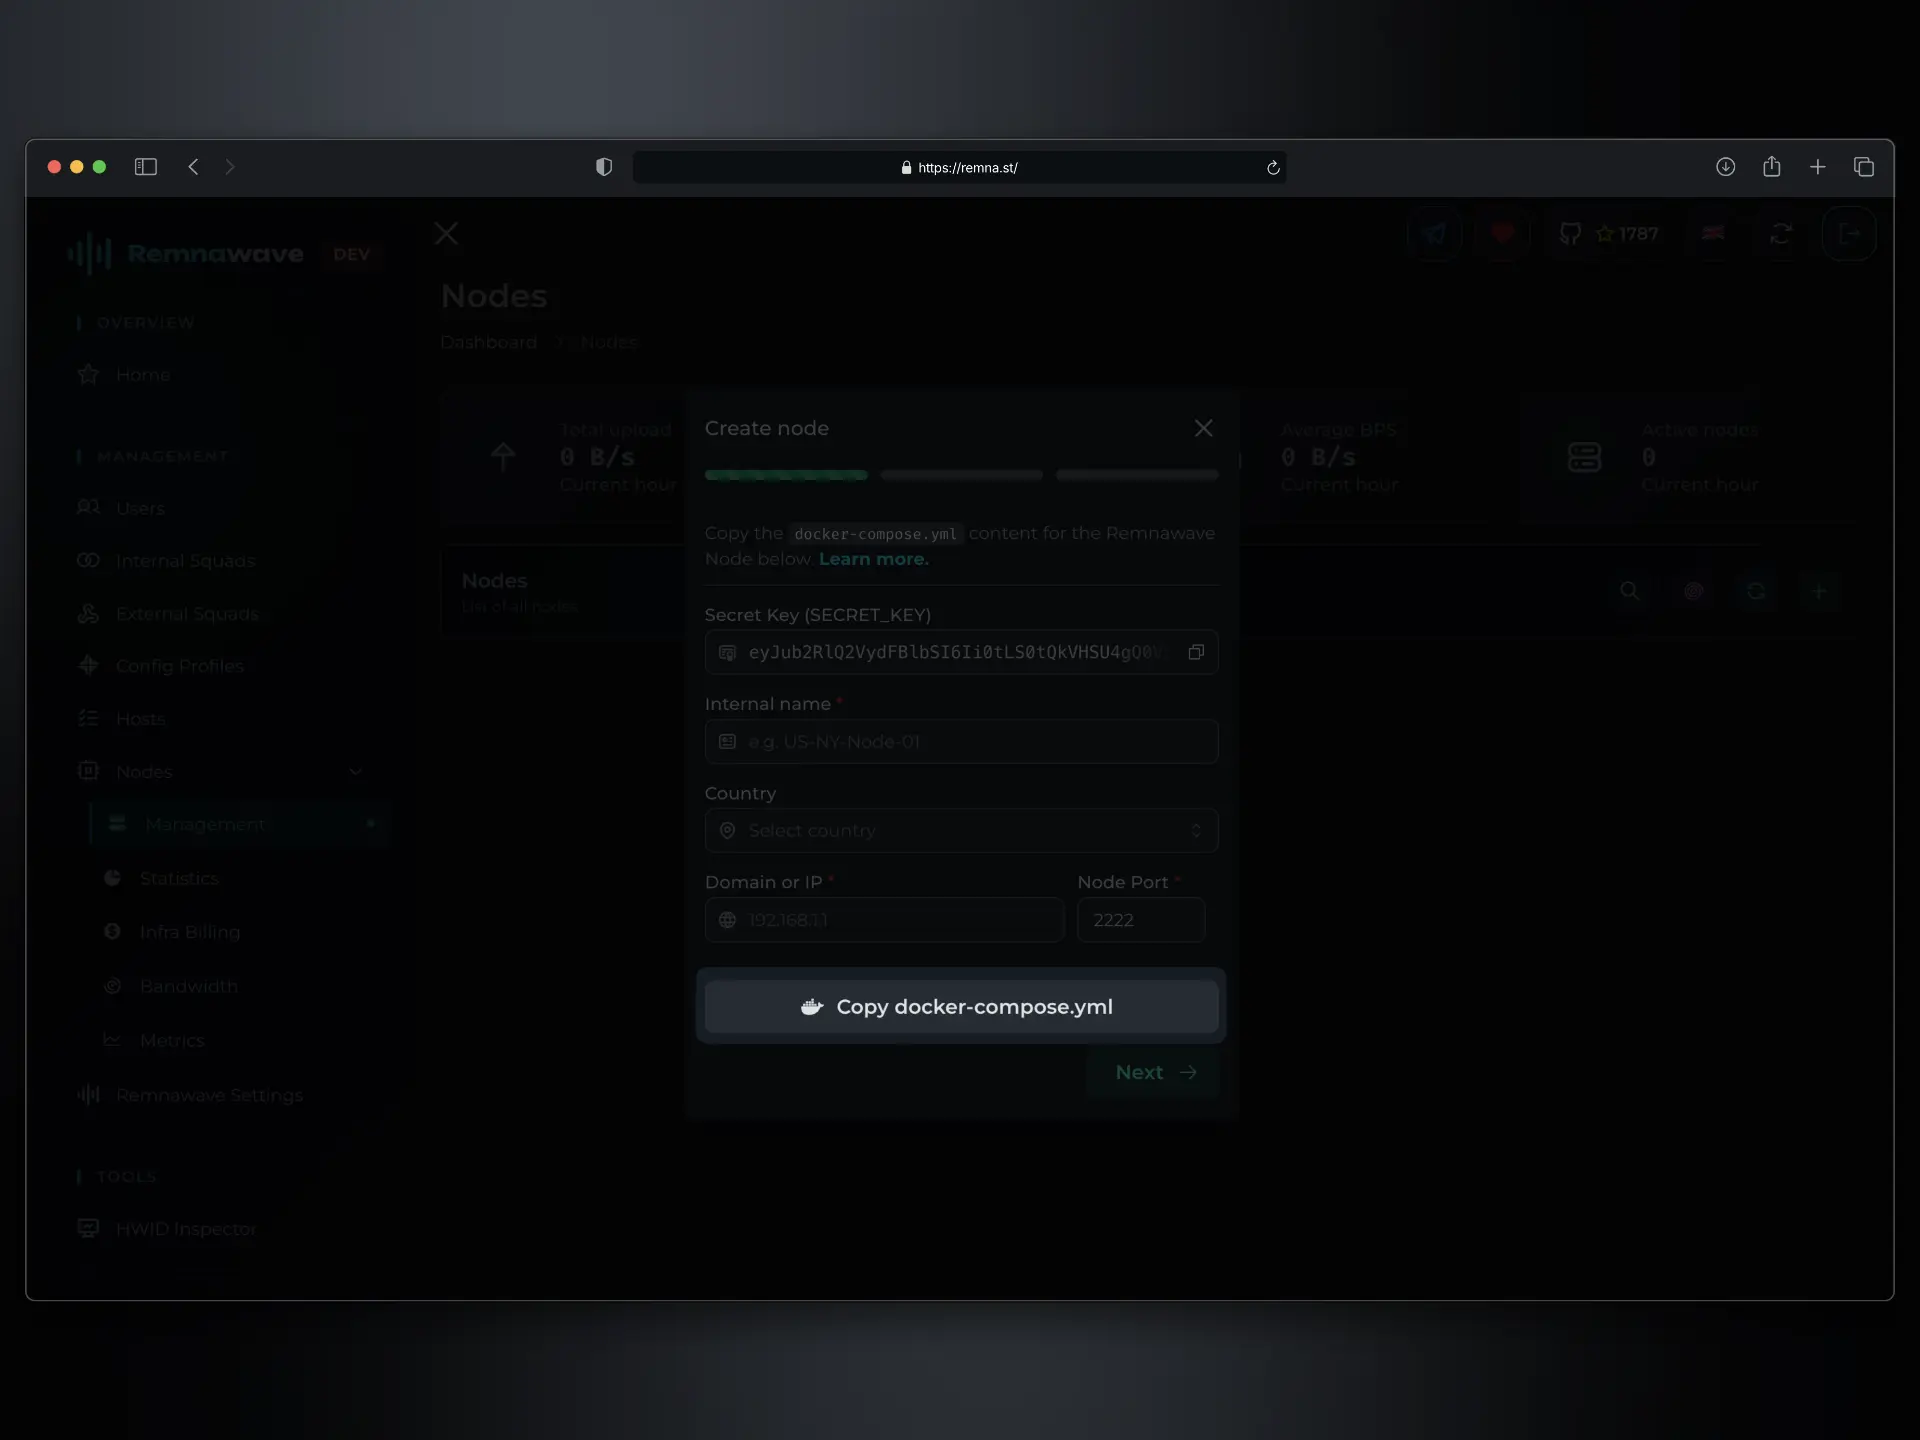
Step 2 - Adding Node
Navigate to Nodes -> Management and click + button to add a new node.
Fill out the form.
Pay attention to Node Port field. It will be used by Remnawave Node to listen internal API requests from Remnawave Panel. It won't be used any other way.
Click on Copy docker-compose.yml button to copy the configuration to your clipboard.
Step 3 — Create docker-compose.yml file
cd /opt/remnanode && nano docker-compose.yml
Paste the configuration from the clipboard and save.
Step 4 — Start the containers
Start the containers by running the following command:
docker compose up -d && docker compose logs -f -t
Step 5 - Finish
In the Node creation card, click on Next, select desired Config Profile and after that click on Create button.
Please remember to close NODE_PORT in the node firewall only for the IP panel.
Advanced usage
Loading modified geosite and geoip files
- This example uses placeholder names for the
*-zapret.datfiles and the:zapretcategories. Actual file names and categories will be different. - Routing configured on the server (node) controls server-side traffic and will not affect client DIRECT connections. To manage client traffic routing, configure routing on the client side.
You can add additional geosite and geoip files by mounting them into the /usr/local/share/xray/ directory inside the container.
Do not mount the entire folder, this will overwrite the default Xray geosite and geoip files. Instead, mount each file separately.
Add the following to the docker-compose.yml file:
services:
    remnanode:
        container_name: remnanode
        hostname: remnanode
        image: remnawave/node:latest
        restart: always
        network_mode: host
        environment:
          - NODE_PORT=2222
          - SECRET_KEY="supersecretkey"
        volumes:
            - './geo-zapret.dat:/usr/local/share/xray/geo-zapret.dat'
            - './ip-zapret.dat:/usr/local/share/xray/ip-zapret.dat'
Usage in Xray config:
  "routing": {
    "rules": [
       // Other rules
      {
        "type": "field",
        "domain": [ // Calling the geosite file
          "ext:geo-zapret.dat:zapret"
        ],
        "inboundTag": [ // Optional
          "VLESS_TCP_REALITY"
        ],
        "outboundTag": "NOT_RU_OUTBOUND"
      },
      {
        "type": "field",
        "ip": [ // Calling the geoip file
          "ext:ip-zapret.dat:zapret"
        ],
        "inboundTag": [ // Optional
          "VLESS_TCP_REALITY"
        ],
        "outboundTag": "NOT_RU_OUTBOUND"
      }
      // Other rules
    ]
  }
Node Logs
You can access Node logs by mounting them to your host file system.
You must set up log rotation, otherwise the logs will fill up your disk!
Add the following to the docker-compose.yml file:
services:
    remnanode:
        container_name: remnanode
        hostname: remnanode
        image: remnawave/node:latest
        restart: always
        network_mode: host
        environment:
          - NODE_PORT=2222
          - SECRET_KEY="supersecretkey"
        volumes:
            - '/var/log/remnanode:/var/log/remnanode'
Usage in Xray config:
  "log": {
      "error": "/var/log/remnanode/error.log",
      "access": "/var/log/remnanode/access.log",
      "loglevel": "warning"
  }
On the server hosting the node, create the folder /var/log/remnanode by running:
mkdir -p /var/log/remnanode
Install logrotate (if not already installed):
sudo apt update && sudo apt install logrotate
Create a logrotate configuration file:
nano /etc/logrotate.d/remnanode
Paste the following logrotate configuration for RemnaNode:
/var/log/remnanode/*.log {
      size 50M
      rotate 5
      compress
      missingok
      notifempty
      copytruncate
  }
Run logrotate to test the configuration:
logrotate -vf /etc/logrotate.d/remnanode
XRay SSL cert for Node
This step is necessary if you implement TLS transport, for example, 'VLESS-Vision-TLS'. For Reality transport, this is not required.
If you’re using certificates for your Xray configuration, you need to mount them into the panel.
Mount the folder using Docker volumes, and refer to the internal path in your configuration.
Inside the container, there is a dedicated (empty) directory for certificates:
/var/lib/remnawave/configs/xray/ssl/
Add the following to the docker-compose.yml file:
remnawave:
  image: remnawave/backend:latest
  container_name: 'remnawave'
  hostname: remnawave
  restart: always
  ports:
    - '127.0.0.1:3000:3000'
  env_file:
    - .env
  networks:
    - remnawave-network
  volumes:
      - '/opt/remnawave/nginx:/var/lib/remnawave/configs/xray/ssl'
  depends_on:
    remnawave-db:
      condition: service_healthy
    remnawave-redis:
      condition: service_healthy
When the Panel pushes the configuration to the Node, it will automatically read the mounted files and send the certificates to the Node.
Usage in Xray config:
  "certificates": [
    {
    "keyFile": "/var/lib/remnawave/configs/xray/ssl/privkey.key",
    "certificateFile": "/var/lib/remnawave/configs/xray/ssl/fullchain.pem"
    // Other fields
    }
  ]
Pay attention to the .key and .pem extensions.